Last year I wrote about how I had been using the Windows Subsystem for Linux (WSL) and the Force.com Migration Tool for Salesforce development. With the ability to develop against any type of org now available, I wanted to set up the Salesforce CLI in my WSL environment.
If you were an early adopter of Salesforce DX, you may have noticed that WSL used to be supported. The core CLI commands always worked fine, but customization of the WSL installation is required in order to enable browser communication with WSL, which is necessary for some of the “auth” and “open” CLI commands. As a result, the Salesforce CLI on WSL is no longer officially supported, but it is possible to get it working on WSL.
Option 1: Use the WSL Terminal with a Windows Browser
This approach is courtesy of Mike Borden and Michael Richmond.
Prerequisites
- Windows 10 with the Linux subsystem (WSL) installed
- Google Chrome browser installed in Windows
Step 1: Install the CLI Using Node Package Manager
The easiest way to install the sfdx CLI on a Linux operating system is to use the Node Package Manager (npm) that comes with Node.js. We will use Node Version Manager (nvm) to install Node.js. because nvm can be used to install Node.js without using sudo, so can be helpful in avoiding potential permissions issues. NVM also enables multiple version of node.js installed on the same machine, which might be helpful down the line.
# Download and install nvm
wget -qO- https://raw.githubusercontent.com/creationix/nvm/v0.33.11/install.sh | bash

# After the script runs, close and then re-open the bash terminal
# Then install Node version 10 using nvm
nvm install 10.0.0

# Verify that node and npm installed correctly
node --version
npm -v

# Install the Salesforce CLI using npm
npm install -g sfdx-cli

# Verify that the CLI installed correctly
sfdx --version
Step 2: Configure WSL to Use Chrome on Windows for Salesforce CLI Commands
Install a utility package with tools to integrate terminal applications with the desktop environment.
sudo apt-get install xdg-utils
Create a file that can be executed in WSL to open the Chrome browser installed in the Windows environment.
# Navigate to the directory where you want to create the file, in my case the home directory
cd

# Create the file
touch chrome-launcher
nano chrome-launcher

# Add the following line to the file and update the path to the location where the Chrome browser is installed on Windows, if necessary
"/mnt/c/Program Files (x86)/Google/Chrome/Application/chrome.exe" $1:$2

# Save and close
Ctrl+x
y

# Make the file executable
chmod +x /chrome-launcher
Set the BROWSER environment variable for your profile.
nano .bashrc

# Add the following line to the bottom of the file, replacing 'username' with your WSL username or updating the path to where you created the file
export BROWSER="/home/username/chrome-launcher"

# Save, close and reload your profile
Ctrl+x
y
source .bashrc

# Verify that the xdg-open command is working
xdg-open https://xkcd.com
Step 3: Connect to a Developer Hub Org and Additional Orgs
The first step in using the Salesforce CLI is to log into a Developer Hub org.
sfdx force:auth:web:login -d -a DevHub
This should open Chrome in the Windows environment and load with a Salesforce login page. Enter your credentials for the org you want to use as the developer hub. After that you can use the sfdx force:auth:web:login command to connect to more orgs and start to deploy and retrieve metadata, work with data, manage users and use all of the awesome features that come with Salesforce DX.
Option 2: Use the WSL Terminal with a WSL Browser
This approach was inspired by Tom Fenton’s article on running graphical programs on WSL and 10 steps to setting up the Salesforce CLI on WSL by Dave Carroll. This approach is more complicated and the browser that opens won’t have the plugins, bookmarks, etc. from your Windows browser. Generally, I prefer the first option, but there may be some scenarios where this approach is more suitable.
Prerequisites
- Windows 10 with the Linux subsystem (WSL) installed
- Note: the steps below have been tested on Ubuntu 16.0.1 Xenial with OpenSSH Server 7.2
Step 1: Install the CLI Using Node Package Manager
Complete Step 1 in Option 1 above.
Step 2: Install VcXsrv Windows X Server in the Windows Environment
Windows Subsystem for Linux doesn’t officially support a graphical user interface, but it is common to install a display server so that Linux-based applications with windows UI elements can used from the command line. VcXsrv is a free and very popular Windows X Server.
- Download VcXsrv
- Run the installer and accept the default options
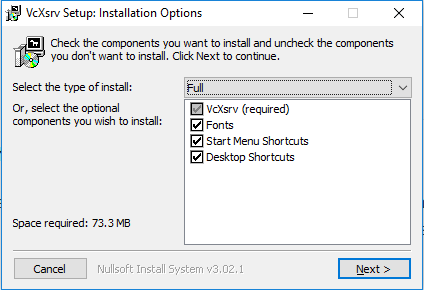
The installer should install VcVsrv in the Program Files on the C drive and also create a desktop shortcut to launch the application, which we will use shortly.
We also need to set the display environment variable for our WSL user.
# Edit the .bashrc file
nano ~/.bashrc

# Set the DISPLAY variable by adding the following line at the end of the .bashrc file
export DISPLAY=:0

# Save and close the file
Ctrl+x
Y

# Close and reopen the terminal, or run the following command to reload the new settings in the current session
source .bashrc
Step 3: Install Firefox Browser in the Linux Environment
Now we need to install a web browser in the WSL environment so that when we run a sfdx command that tries to launch a web browser, there is a browser available.
sudo apt install firefox


# Verify that firefox installed correctly
firefox -v
To test the process of opening a web page in a browser from the WSL terminal, double click the VcVsrv icon on the Windows 10 desktop. This will start the display server so that it can receive requests from WSL.
![]()
You should see the XLaunch icon in the Windows 10 system tray. Now launch Firefox from the command line
firefox -browser
A Linux version of Firefox should launch and you should be able to type a URL in the search bar and navigate to web pages.
Step 4: Configure OpenSSH Server on WSL
The version of OpenSSH Server that comes with WSL running Ubuntu 16 (Xenial) is insufficient for working with the Windows X Server, so we need to remove and then re-install OpenSSH Server.
sudo apt remove openssh-server
sudo apt install openssh-server
Edit the OpenSSH configuration file
sudo nano /etc/ssh/sshd_config
Set the following variables
- Port 2200 (change from 22, since Windows 10 also has OpenSSH server running on port 22; be sure to uncomment this line)
- ListenAddress 0.0.0.0 (uncomment this line)
- PermitRootLogin no (change from PermitRootLogin prohibit-password; uncomment this line)
- PasswordAuthentication yes (change from PasswordAuthentication no)
- UsePrivilegeSeparation no (add this line to the bottom of the file)
- AllowUsers username (add this line to bottom of file and replace “username” with your Linux username)
Save the change and restart the service
# Close and save the files when editing with nano
Ctrl+x
Y

# Restart the OpenSSH Server
sudo service ssh --full-restart
Step 5: Connect to a Developer Hub Org and Additional Orgs
The first step in using the Salesforce CLI is to log into a Developer Hub org.
Make sure to double click the VcVsrv icon to start the windows x server, then type the following command
sfdx force:auth:web:login -d -a DevHub
This should open Firefox in the WSL environment and load with a Salesforce login page. Enter your credentials for the org you want to use as the developer hub. After that you can use the sfdx force:auth:web:login command to connect to more orgs.
Where to Go Next
Add Auto-completion for the Salesforce CLI: Wade Wegner created an auto-completion script for speeding up entry of Salesforce CLI commands in a Bash environment.
Set up VS Code: Salesforce provides a number of extensions that make VS Code a great IDE for Salesforce development and there are a few things to customize in order to set up VS Code for Salesforce development on Windows while using the WSL terminal.
Resources
- Salesforce: DX Setup Guide
- Salesforce: CLI Command Reference
- Important: Do not change Linux files using Windows apps and tools
- Overview of Bash on Ubuntu on Windows


